Getting started with Spanwise for schools
This guide takes you from creating your account through to running your school day to day. Follow it in order — several steps depend on ones before them, and doing them out of sequence is the most common reason something doesn't work.
You don't have to finish in one sitting. Everything you enter is saved as you go.
Before you begin
Spanwise works on a laptop, tablet or phone. You need a modern browser — Chrome, Firefox, Edge or Safari.
You'll want a reasonable internet connection for the first setup. After that, most of the system keeps working during an outage, which the last section covers in detail.
Have to hand:
- Your school's name as you want it to appear on receipts and report cards
- Your own email address and phone number
- The district and village your school is in
- A list of your classes and which level each belongs to
- Your current term dates
- Your fee structure for the year
Step 1 — Create your account
Go to the Spanwise app and choose Register. You'll be asked for:
| Field | Notes |
|---|---|
| School name | 2–100 characters. Appears on receipts and reports. |
| Business type | Choose Education |
| Your full name | The account owner |
| Username | Lowercase letters, numbers and underscores only. 3–30 characters. |
| Password | At least 8 characters |
| Email address | Used for verification and password reset |
| Phone number | 10–15 digits |
| Country | Defaults to Uganda |
| District and village | Optional, but worth filling in |
Your username has to be unique across all Spanwise schools, not just your own. If it's taken you'll be asked to choose another.
Prefer us to do this? We can register your school for you. Send Spanwise support the details above and we'll set it up and send you the login.
Verify your account
After registering you'll receive verification codes by email and SMS. Enter both to activate the account.
Your school starts on a 14-day trial with every module switched on. After that it is UGX 80,000 a month for the whole school, paid by MTN or Airtel Mobile Money — we'll be in touch before the trial ends.
Step 2 — What we configure for you
Some settings are handled by the Spanwise team rather than from your own login. That's deliberate — they affect security, cost or how much data your staff's phones download, and we'd rather talk them through with you than have them switched on by accident.
Get in touch when you want any of these.
Optional modules
Your school starts with the core: students, admissions, fees, marks, timetable, attendance, SMS, messages and the dashboard. These stay switched off until you ask for them:
- Payroll
- Boarding and hostel
- Sponsorship
- Student ID cards
- Discipline records
- Homework portal
- Purchase orders and departmental workflows
- Full accounting
- WhatsApp messaging
- Mobile money
- School transport
- Backdated entries
- Multi-facility, for groups running several schools
Offline sign-in
Whether staff can log in during an internet outage, and for how many days. Off by default, because it means credentials are held on the device.
Data preparation for offline use
How much your staff's devices download in the background so pages work during an outage. Three levels — off, light, or full. Full includes each student's record, attendance, payment history and photo, which is a real cost on mobile data. Worth choosing deliberately rather than defaulting.
Session and device settings
How long a signed-in session lasts, how long before an idle device locks itself, and how old cached data may get before staff are warned it's stale.
Device verification asks for a one-time code by email when someone signs in from an unrecognised device. Worth turning on if staff use personal phones.
Step 3 — Set up your academic structure
Everything else depends on this, so do it first. Go to Academics → Academic Setup.
3.1 Enable your levels
Choose which levels your school runs — Nursery, Primary, Lower Secondary, Upper Secondary. Only what you enable appears elsewhere in the system.
3.2 Create your academic year
Add the current year with its start and end dates, and mark it as current. Most of the system filters by academic year, so nothing else works properly until one exists.
3.3 Add your terms
Add each term with its dates, and mark the one you're in as current. Fee reminders and report cards use this to know which term they're referring to.
3.4 Create your classes
For each class you'll need a name (P.5, S.2, Baby Class), the level it belongs to, and the academic year. You can also set a stream (P.5 A, P.5 B), the class teacher once you've added staff, and a capacity.
A class can't be created without a level and an academic year. If the form won't accept it, one of those is missing.
3.5 Add your subjects
Add every subject taught. You can then assign teachers to specific subjects in specific classes — which is what lets a subject teacher enter marks for their own subjects and nobody else's.
Step 4 — Add your staff
Go to Settings → Manage Staff and choose Add Staff.
For each person you'll enter their full name, a username, email, phone, an initial password and their role.
Give them the password directly — they can sign in with it straight away. There's no email invitation to wait for, which matters when you're setting up a school somewhere email isn't universal.
Choosing a role
Roles are grouped to make this easier.
| Group | Roles |
|---|---|
| Leadership | Head Teacher — broad access across academics, staff, messaging and reporting |
| Teaching staff | Class Teacher — attendance, marks for their subjects, minor discipline records Subject Teacher — marks for their subjects, homework Lab Technician |
| Non-teaching staff | Accountant — fees, accounting, payroll, reconciliation Academic Registrar — academic structure, admissions, marks approval Accounts Officer — fee collection, sponsorship Fee Cashier — recording payments Librarian and Storekeeper — inventory Admissions Officer — admissions, ID cards, sponsor links Boarding Master — dormitories and exeats Van Attendant — marking children on and off the school van Support Staff |
Each role arrives with sensible permissions already set. Staff see only the parts of the system they can actually use — a subject teacher has no Payroll or Accounting in their menu at all, and lands on Marks when they sign in rather than a dashboard they can't read.
Adjusting individual permissions
Below each staff member you can grant or revoke any single permission, including ones their role normally carries. Useful when someone's job doesn't fit a standard role — a class teacher who also collects fees, say.
Changes take effect the next time that person's session refreshes.
Step 5 — Set your fee structure
Go to Fees & Revenue → Fees, then Fee Structures.
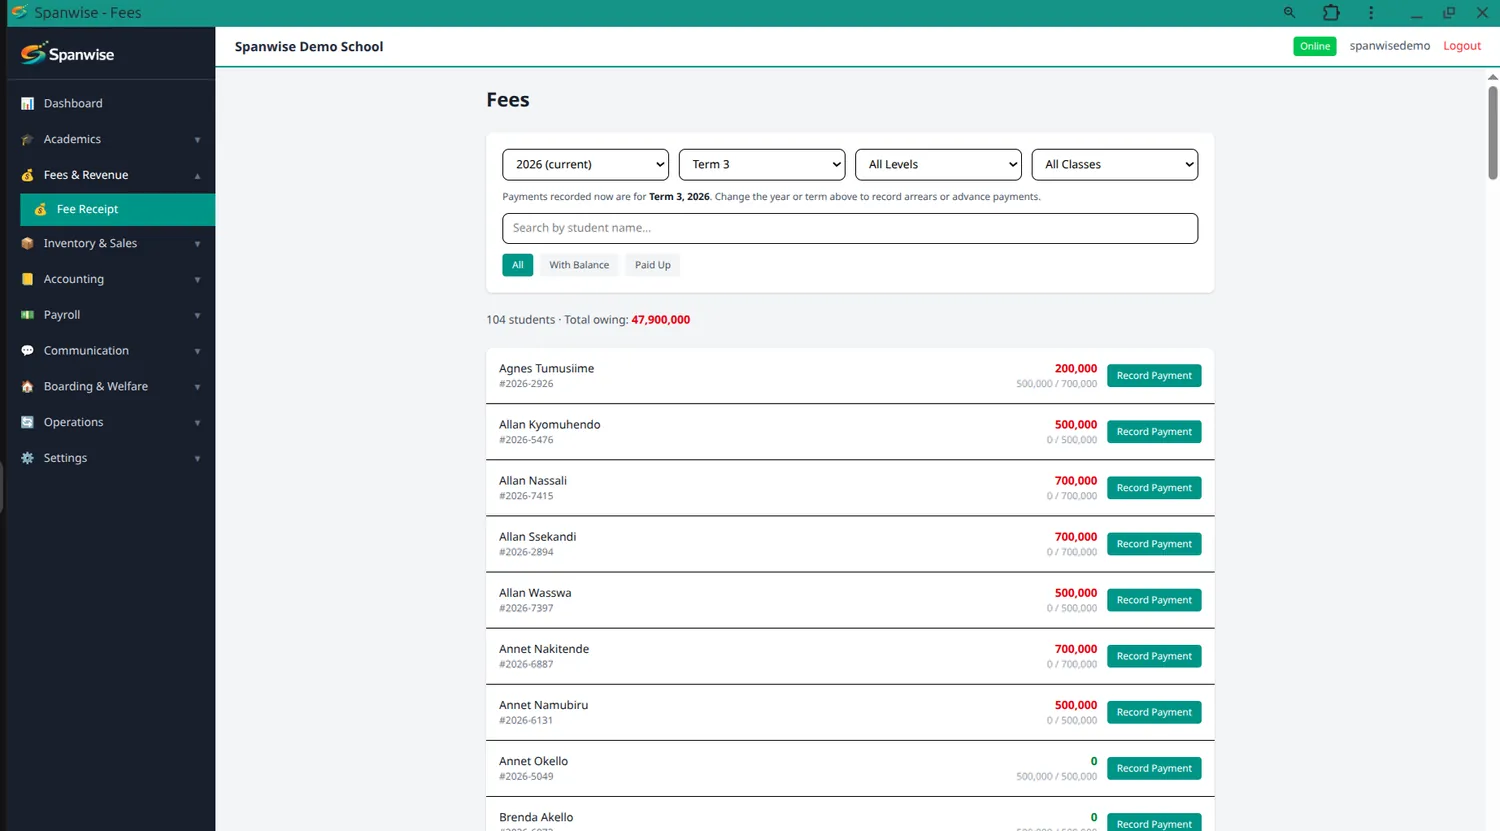
A fee structure says what a class or level owes. You can set one per class, or one for a whole level that applies to every class in it. A class-specific structure takes priority where both could apply.
For each structure, add the items and amounts — tuition, development, lunch, and so on.
Termly or annual? If your fees differ by term, create one structure per term and set the term on each. If they're the same all year, leave the term blank and it applies throughout.
Once structures exist, every student's balance is worked out automatically — what their class owes, minus what they've paid.
Step 6 — Enrol your students
Go to Students. You can add students directly, or take them through Admissions first if you want a record of the application.
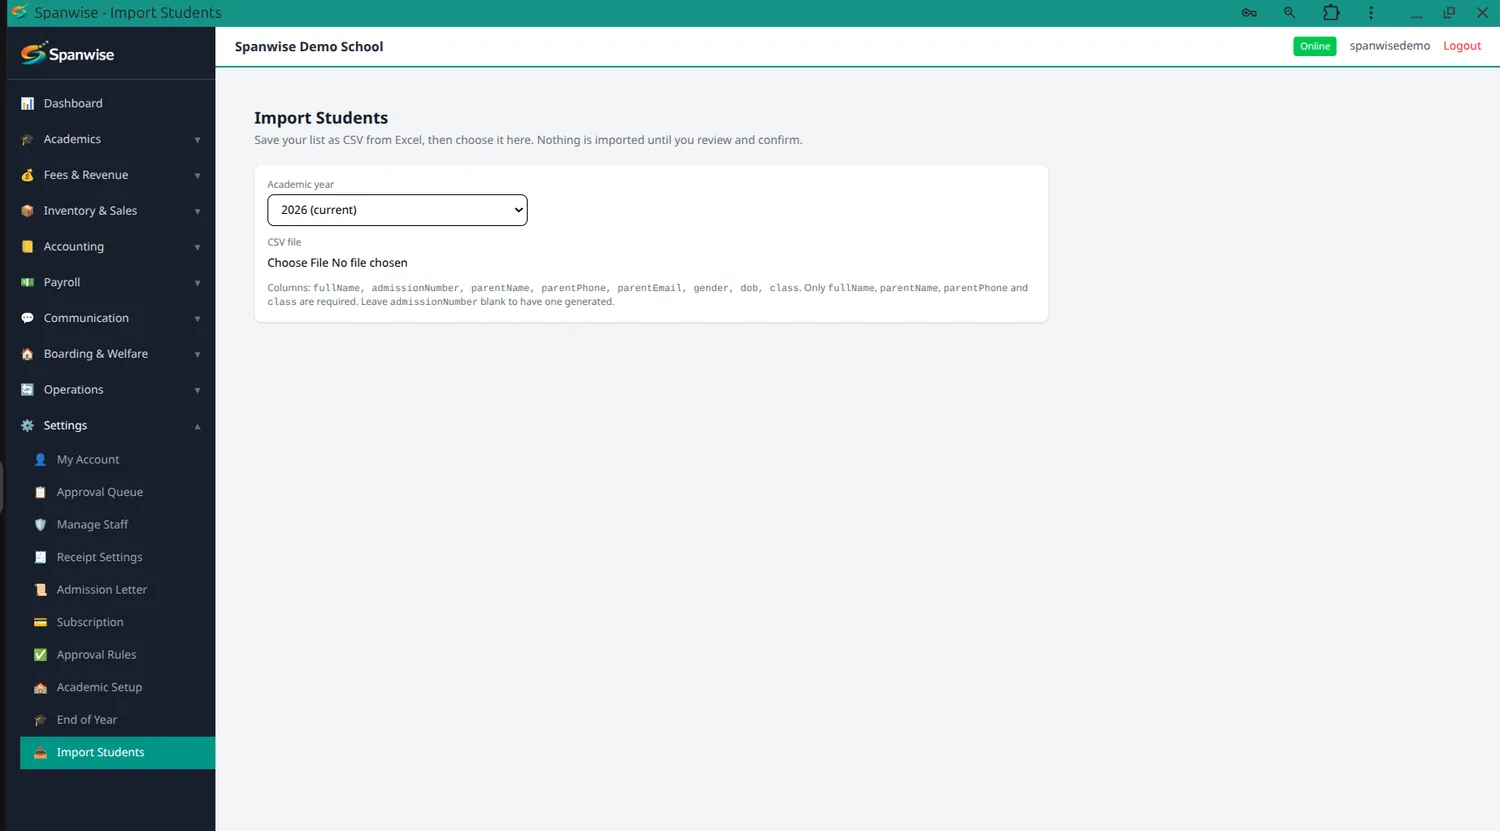
Enrolling a student needs a class and an academic year. You'll also capture their full name and admission number, parent or guardian name, phone and email, and optionally an address, blood group and photo.
The parent's phone matters more than it looks — it's how fee reminders, results alerts and transport confirmations reach the family.
The student profile
Each student has a profile showing their details, attendance summary, payment history and class history. What a staff member sees there depends on their permissions: a subject teacher sees the child's name, class and parent contact, but not the family's payment history.
Step 7 — Day-to-day use
With setup done, this is what your school does each day.
Recording fee payments
Fees & Revenue → Fees. Choose the class, find the student, record the payment. A receipt number is generated automatically, and the payment posts to your accounts if accounting is enabled.
Filter by term to see a term's balances, or leave it on whole year for the annual picture.
Taking attendance
Students → Attendance. Choose the class and date, then mark each child present, absent, late or excused. Re-marking a child updates the existing record rather than creating a duplicate, so it's safe to go back and correct a mistake.
Entering marks
Academics → Marks. Choose the class, subject and term, then enter each student's score. A subject teacher can only enter marks for subjects they're assigned to teach.
Marks are submitted for approval, then approved by whoever holds that permission — usually the Head Teacher or Academic Registrar. Report cards are generated from approved marks.
Messaging parents
Communication → SMS. Send announcements, fee reminders, results alerts or emergency messages to a class, a level or the whole school.
Automatic alerts need a template before they'll send anything. Write one for each alert type you want — fee reminders, results, transport pickup and drop-off. Until a template exists, that alert sends nothing. That's deliberate: every message costs money, and we'd rather you chose to switch it on than found it on a bill.
Step 8 — School transport
Only if we've enabled the transport module for you.
Setting it up
Boarding & Welfare → Transport.
- Add your vans — name, number plate, seats, driver's name and phone
- Create routes — a name, which van runs it, and the fee per term
- Add stops to each route, in order, with pickup and drop-off times
- Subscribe children — choose a route, a child, and their stop
Only subscribed children are charged the route's fee. A child who walks to school is never billed for transport.
If a child changes route mid-term, subscribe them to the new one. The old subscription is ended automatically and the change is recorded with its date, so your bursar can decide what to charge.
The daily register
Boarding & Welfare → Van Register. The van attendant chooses the route, the date and the trip — morning or afternoon — then marks each child as on board, absent, or taking other transport.
The register shows only children subscribed on that date, so a child who left the van last term doesn't clutter it.
If you've written the transport SMS templates, the parent gets a message when their child boards in the morning and is dropped off in the afternoon — carrying the time the child actually boarded, even if the register was marked with no signal and synced later.
Step 9 — Watching your school
Dashboard shows your key figures for whatever period you select — revenue, fee collection rate, attendance rate, exam performance, and a card for each module you have enabled. Tap any card to see the detail table beneath it, which you can export to CSV, Excel or JSON.
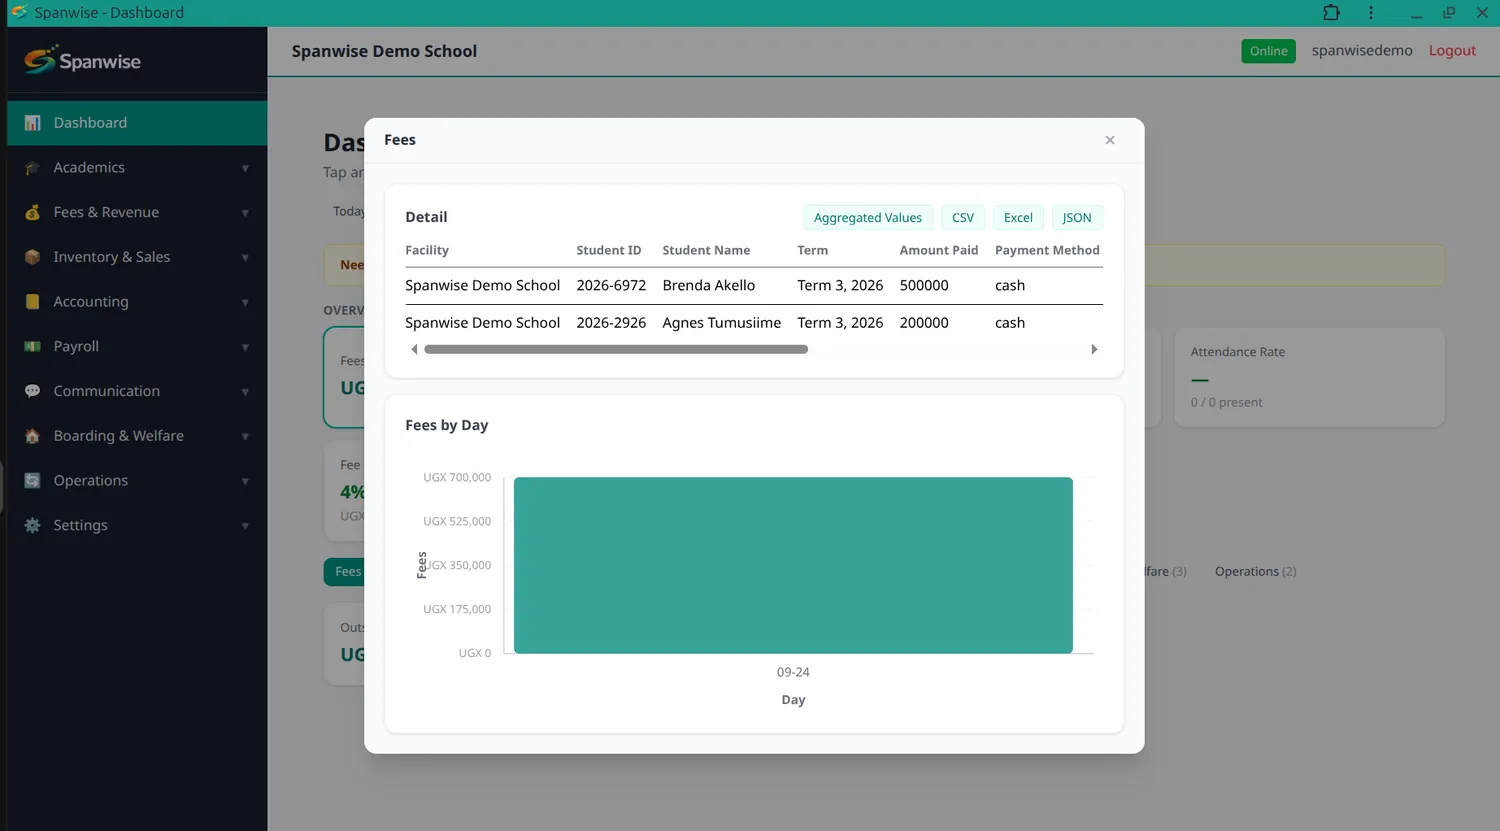
History shows what's happened across the school — fees, sales, expenses, attendance, logins and approvals — over any period you choose.
Working without internet
This is the part most schools care about, so it's worth being precise about what does and doesn't work.
What works offline
Reading. Every page a member of staff has permission to see will show data during an outage, provided that data was downloaded beforehand.
Recording. Fee payments, attendance, marks, sales, expenses, discipline records, transport registers and van subscriptions can all be recorded offline. They're saved on the device and sync automatically when the connection returns.
You'll see a count of unsynced records, and a note on screen when something was saved locally rather than sent.
What needs a connection
- Creating vans, routes and stops
- Downloading report cards and payslips, which are generated on our servers
- Sending SMS, which needs the network by definition
- Approving marks, discipline decisions and purchase orders — these act on records held centrally
- Mobile money, which needs the live payment network
Preparing for an outage
Devices download data in the background so pages work even if nobody opened them beforehand. How much depends on the level we've set for your school — light covers reference data and the main lists, full also includes each student's record, attendance, payment history and photo.
Full is the better experience and a real cost on mobile data. Tell us which suits your school.
Date ranges are the exception. The standard periods — today, this week, this month, this year and so on — are all available offline. A custom date range you haven't opened while online won't be, and the page will say so rather than showing you an empty table.
Signing in during an outage
If we've enabled offline sign-in, staff can log in without a connection for the number of days you've chosen, using the same username and password. It only works on a device they've already signed in on while online.
Getting help
Contact us for anything on this list, or anything that isn't working the way this guide describes:
- Enabling any optional module
- Offline sign-in, session and device settings
- Changing how much data devices download
A note on what we've chosen not to automate
A few things in Spanwise deliberately ask for a decision rather than making one.
Transport fees when a child changes route mid-term. The system records exactly when the change happened and leaves the money judgement to your bursar, because schools handle this differently and a rule we invented would be wrong somewhere.
SMS templates. Nothing sends until you've written the wording. Automatic messages a school didn't ask for are worse than none.
Optional modules. Off until requested, so a school isn't paying attention to features it doesn't use.
This makes the first week slightly more work. It also means the system does what your school actually decided, rather than what we assumed.